- Introduction
- The birth of an idea
- Gathering components
- Drafting the plan and assembling parts
- Programming setting the foundation
- Decisions and direction
- Polishing and finalizing
- GitHub repo
- Conclusion
Introduction
In the second year of my Electrical Engineering program, the school provides us an exciting opportunity: to conceptualize, design, and implement our own project. This journey began in September 2018.
After much deliberation, I settled on a concept that intrigued me immensely: a door lock that could be unlocked via fingerprint or RFID (Radio Frequency Identification), combined with a web-based platform for remote control and monitoring. The idea of bridging the physical and digital worlds felt exciting, but also posed a significant challenge.
I approached my professor with this ambitious project idea. Upon hearing it, there was a moment of hesitation. They saw the complexity of the project and the time constraints we were working under. Undeterred, I made a case for my vision: if time turned out to be a constraint, my minimum deliverable would be the hardware aspect – the biometric door lock itself. The web-based platform would be the ‘cherry on top’, if time permitted.
With this in mind, my professor gave me the green light. And thus, my four-month adventure into the fascinating intersection of biometric security and the Internet of Things (IoT) began. Here is the story of my journey through this ambitious project.
The Birth of an Idea
At the time of the project, I had already acquired a solid foundation in web development. I was eager to explore how I could fuse this with a hardware component, ultimately crafting a solution that boasted both a physical and a web interface. My proficiency in the Arduino library/framework, along with a basic knowledge of C++, equipped me well for this challenge. Moreover, my passion for programming was a driving force behind this venture.
The question that loomed was: what could I create that would both stretch my skills and serve as a practical tool beyond the completion of the project? I wanted to develop something that I could continue to use, something that would find purpose in my daily life.
One day, while idly observing the lock on my door, an idea sparked. What if I could turn it into a smart lock? What if I could revolutionize the way I accessed my room, incorporating both biometrics and a web interface? And with that thought, the idea for my project was born. I decided to dive into the world of biometric security and the Internet of Things (IoT) and create a smart door lock that could be controlled through a web interface.
Gathering Components
With the approval secured and the project direction clear, I embarked on the next phase: researching and sourcing the appropriate components. I wanted to ensure that the hardware I selected was not only fit for purpose but was also compact, reliable, and well-supported in terms of software libraries and community resources.
Here are the primary components that I zeroed in on:
- Arduino Nano
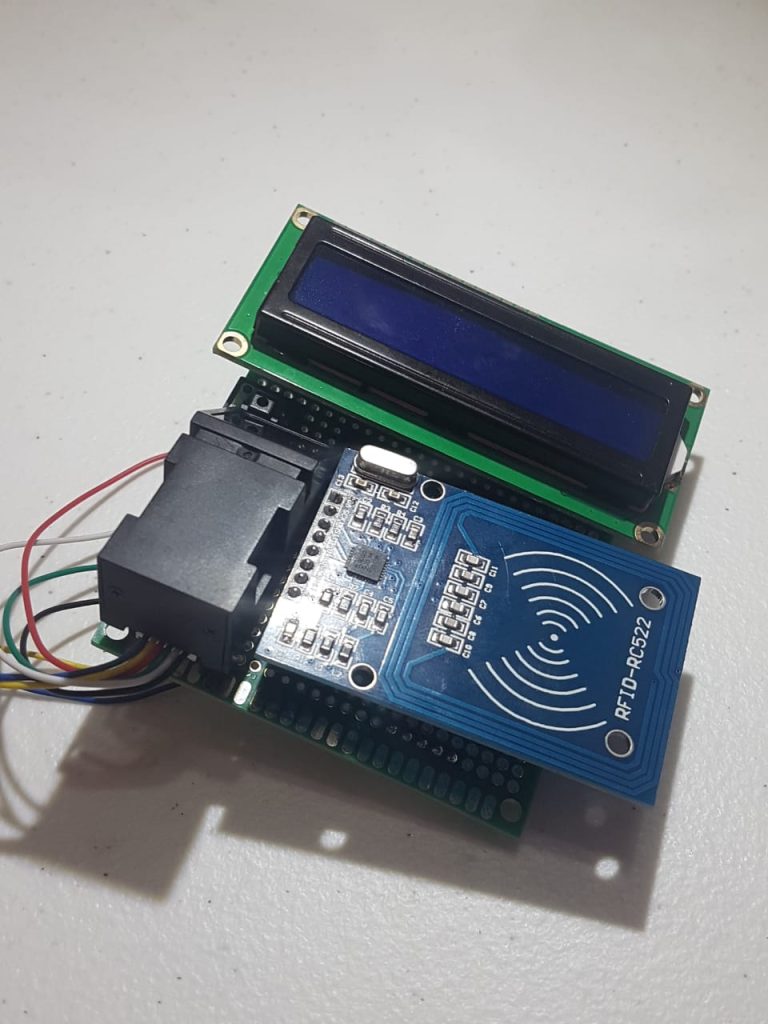
- 16×2 Liquid Crystal
- RFID-RC522 module
- Fingerprint Sensor
- Voltage Regulator
- Door lock
- Stepper Motor
- 3D printed parts
These components formed the backbone of my smart lock. In the subsequent steps, I delved into the challenging, yet rewarding, process of integrating them into a cohesive and functional system.
Drafting the Plan and Assembling Parts
Once my project was approved, I plunged into the crucial tasks of sourcing the components and laying down the blueprints for the system. The first step was to create a schematic, carefully considering how to distribute the Arduino pins and supply power using a 9V battery that needed to be stepped down to 5V for the components to function correctly.
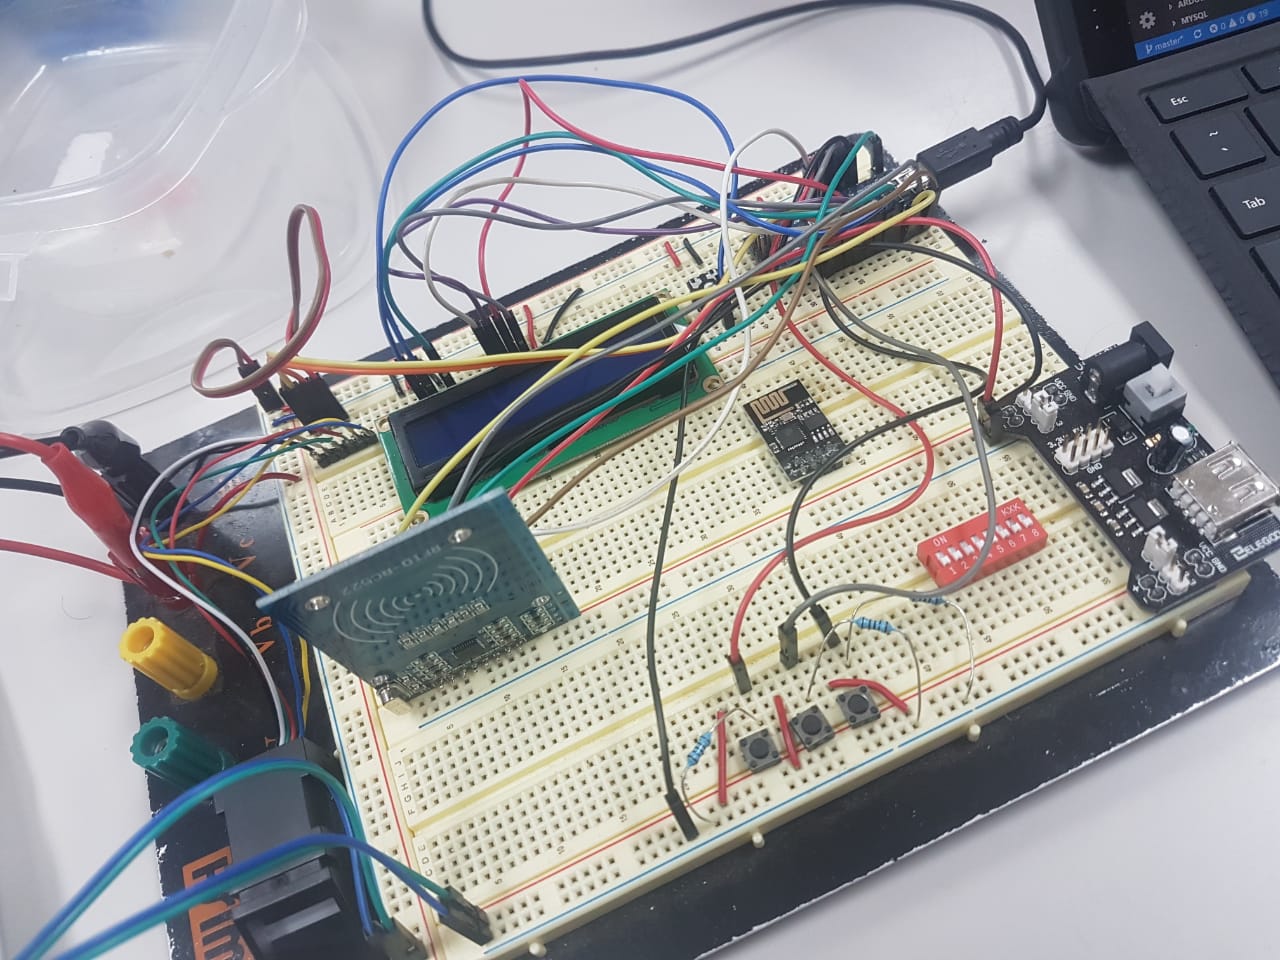
Once I had a blueprint ready and components on hand, I began the practical part of my project: assembling everything on a breadboard. This stage allowed me to physically map out my system and anticipate any issues that could arise during the final assembly. It was at this point that I began to see my blueprint come to life, piece by piece.
Programming: Setting the Foundation
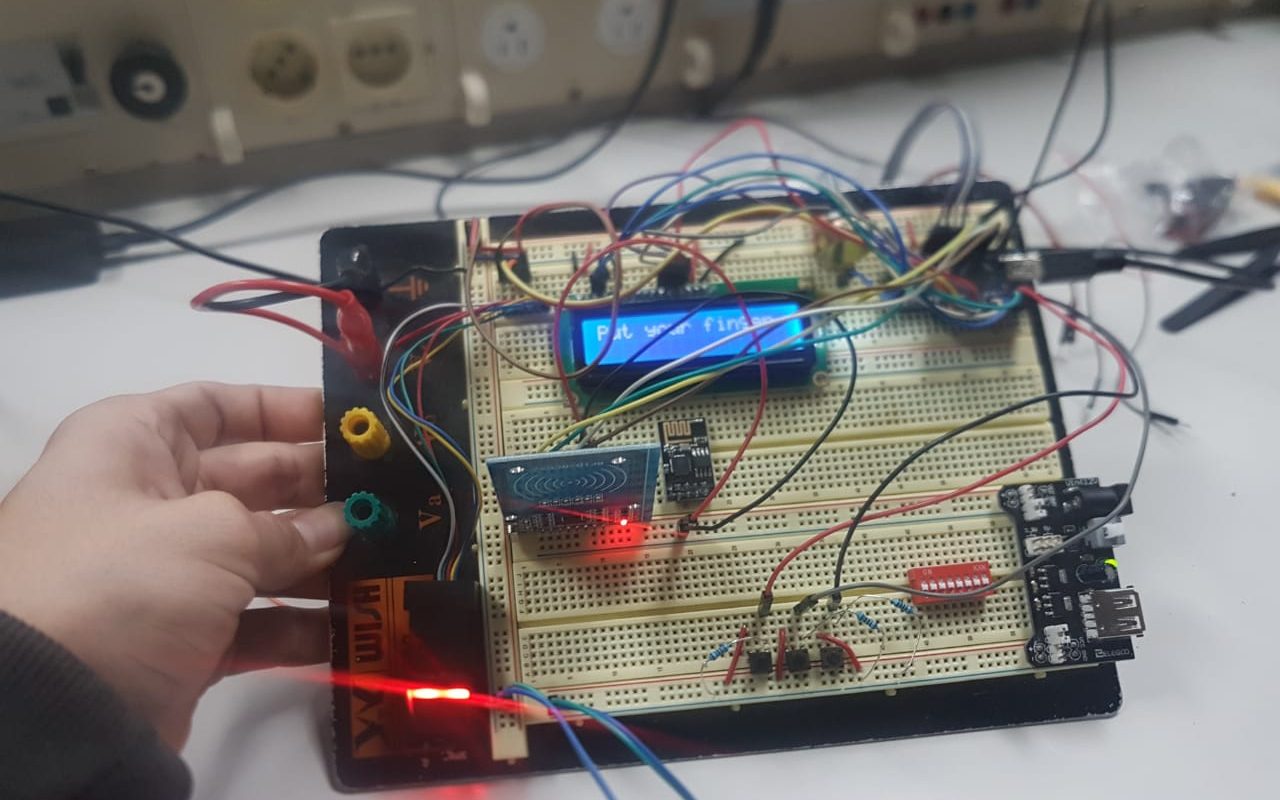
With the breadboard prototype ready, the next logical step was programming. This meant integrating the libraries and checking the functionality of each component. I began by running some basic example codes to confirm the correctness of the wiring and the working condition of each component.
However, integrating these different components into a harmonious system presented challenges. One particular issue was with the fingerprint sensor library. Despite the sensor’s documentation stating the possibility of exporting the fingerprint map and BMP, so I can store them in a Database. This function wasn’t readily available in the library, leading me to delve deep into the fingerprint sensor’s data package software protocol.
This exploration required handling the sensor at a much lower level than initially anticipated. The learning curve was steep, but the insights about the sensor’s inner workings proved invaluable. It provided a more profound understanding of how to design a system that could effectively integrate all the elements.
However, despite a significant amount of time and effort, I was unable to access the fingerprint map or BMP. This setback compelled me to reassess my plans. I was torn between continuing to build the web platform or focusing on getting the “smart” lock to function independently.
Ultimately, I decided to prioritize creating a reliable, biometrically-secure door lock. The web interface was put on the back burner. This shift in direction taught me invaluable lessons about flexibility, adaptability, and focusing on core functionalities when working under time constraints. With a revised plan, I was ready to turn this blueprint into reality, creating a smart lock that could operate independently.
Decisions and Direction
With the project deadline looming, I had to make a strategic decision about the functionality of the door lock system. After careful consideration, I decided to focus on making the door lock operate using the fingerprint module, leaving the RFID functionality for future enhancement. This decision was made to ensure the successful and timely completion of the project’s primary goal, which was to build a secure, functioning smart lock.
With this revised focus, I started developing the software to handle basic operations such as fingerprint registration, deletion, and door operation (i.e., activating the stepper motor to lock or unlock the door). The code was basic, but it did the work.
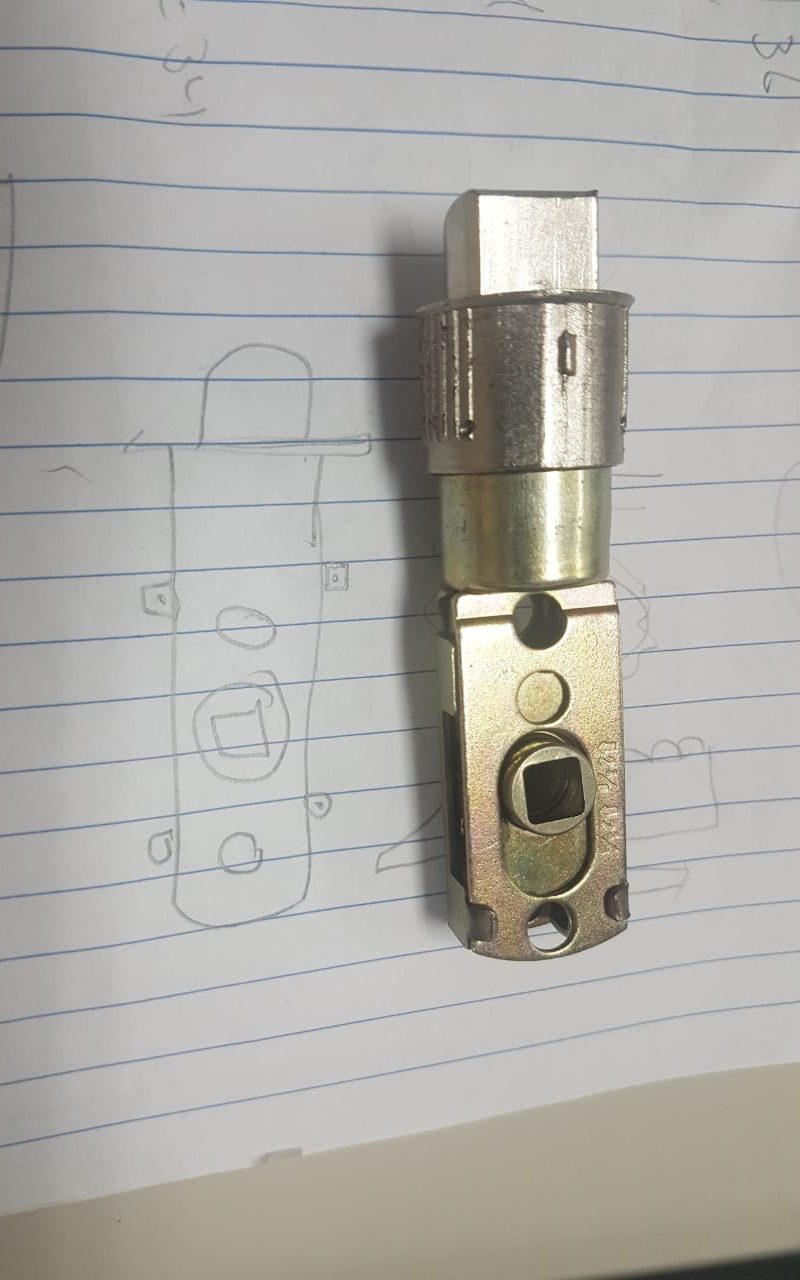
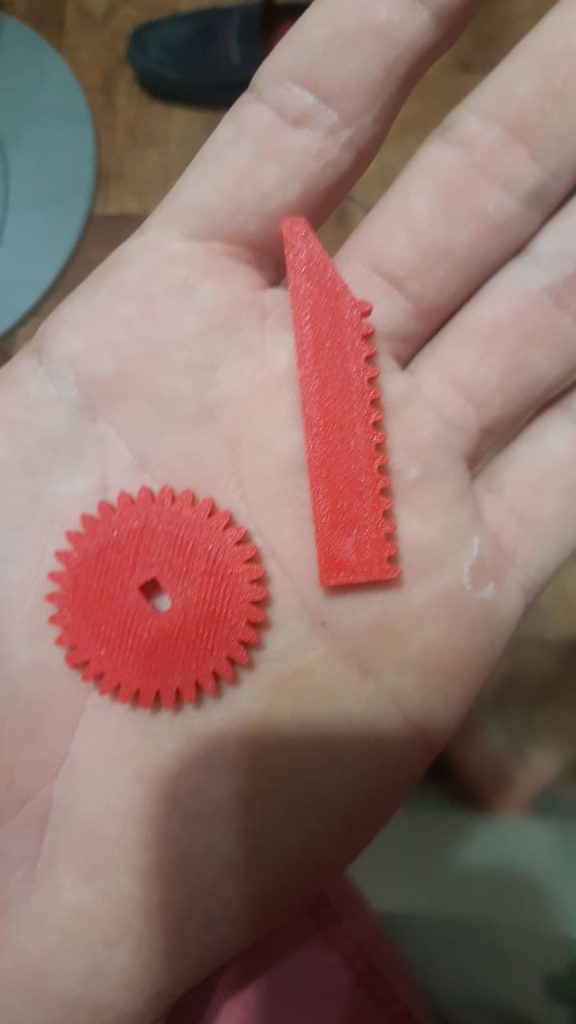
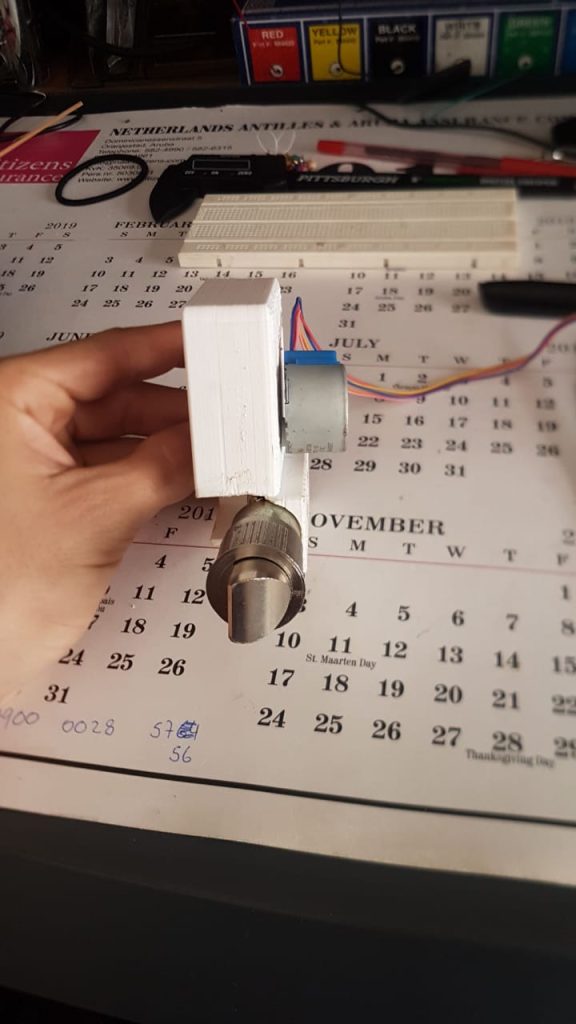
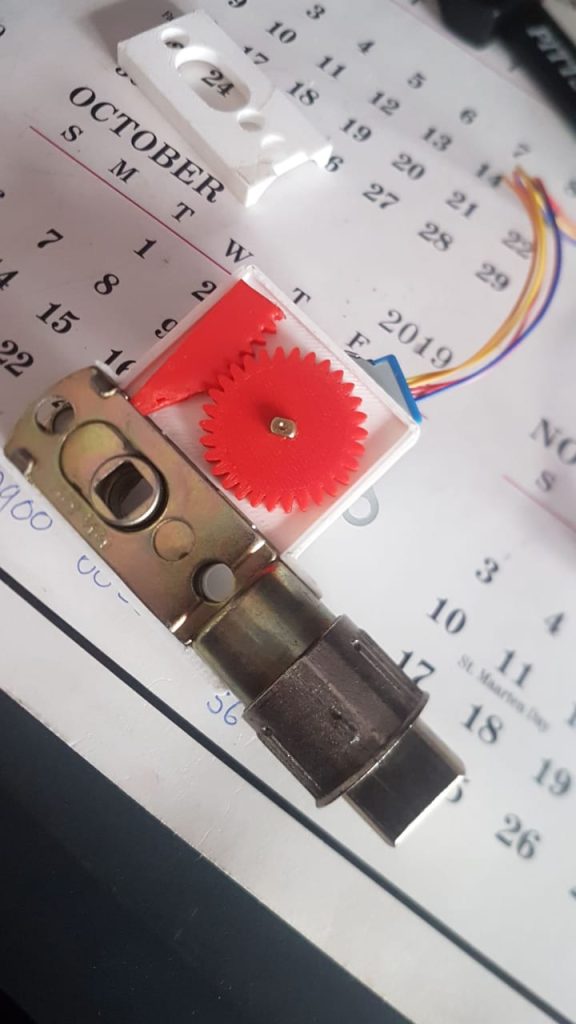
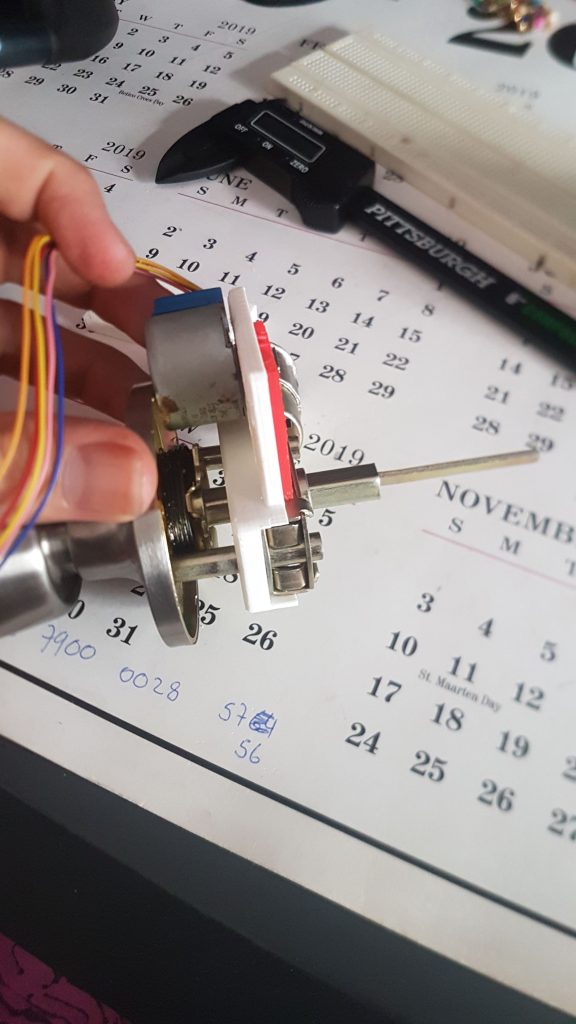
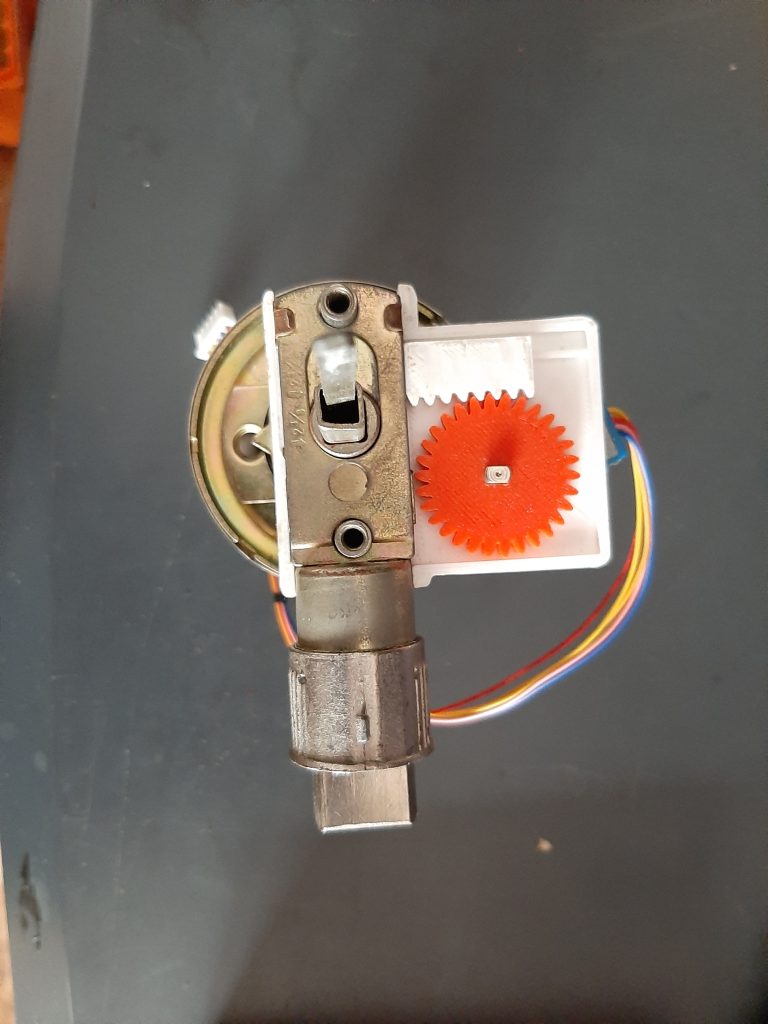
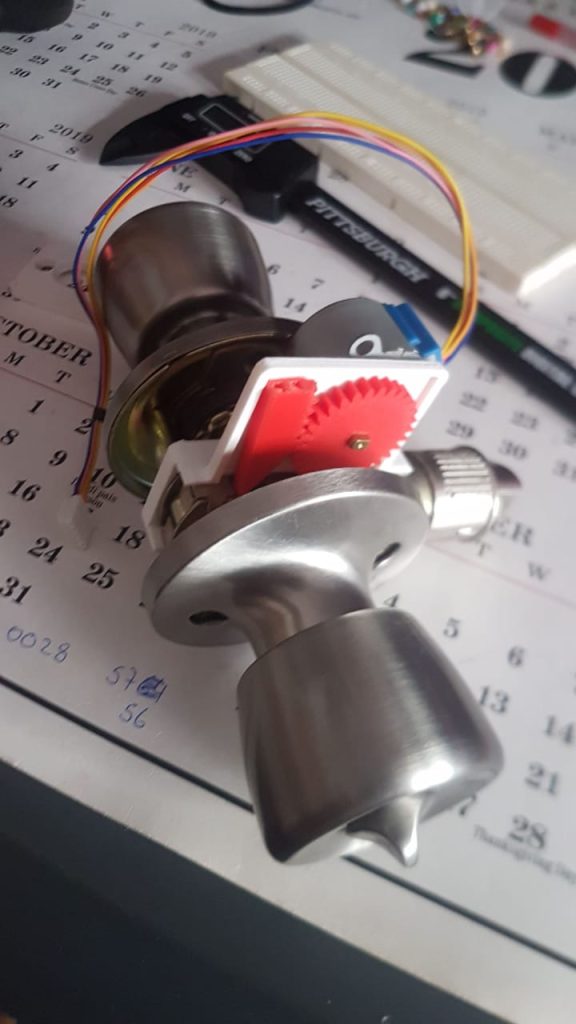
Simultaneously, I ventured into 3D modeling to design a simple gear system that would allow the stepper motor to physically lock and unlock the door. This aspect of the project enabled me to apply my theoretical knowledge to practical problem-solving, bridging the gap between concept and reality.
With the decisions made, and the project direction set, it was time to work diligently towards the finish line. The experience was a clear reminder that engineering projects often require adaptability and a willingness to reevaluate goals in the face of time constraints and unforeseen challenges.
Polishing and Finalizing
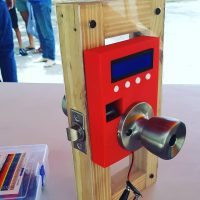
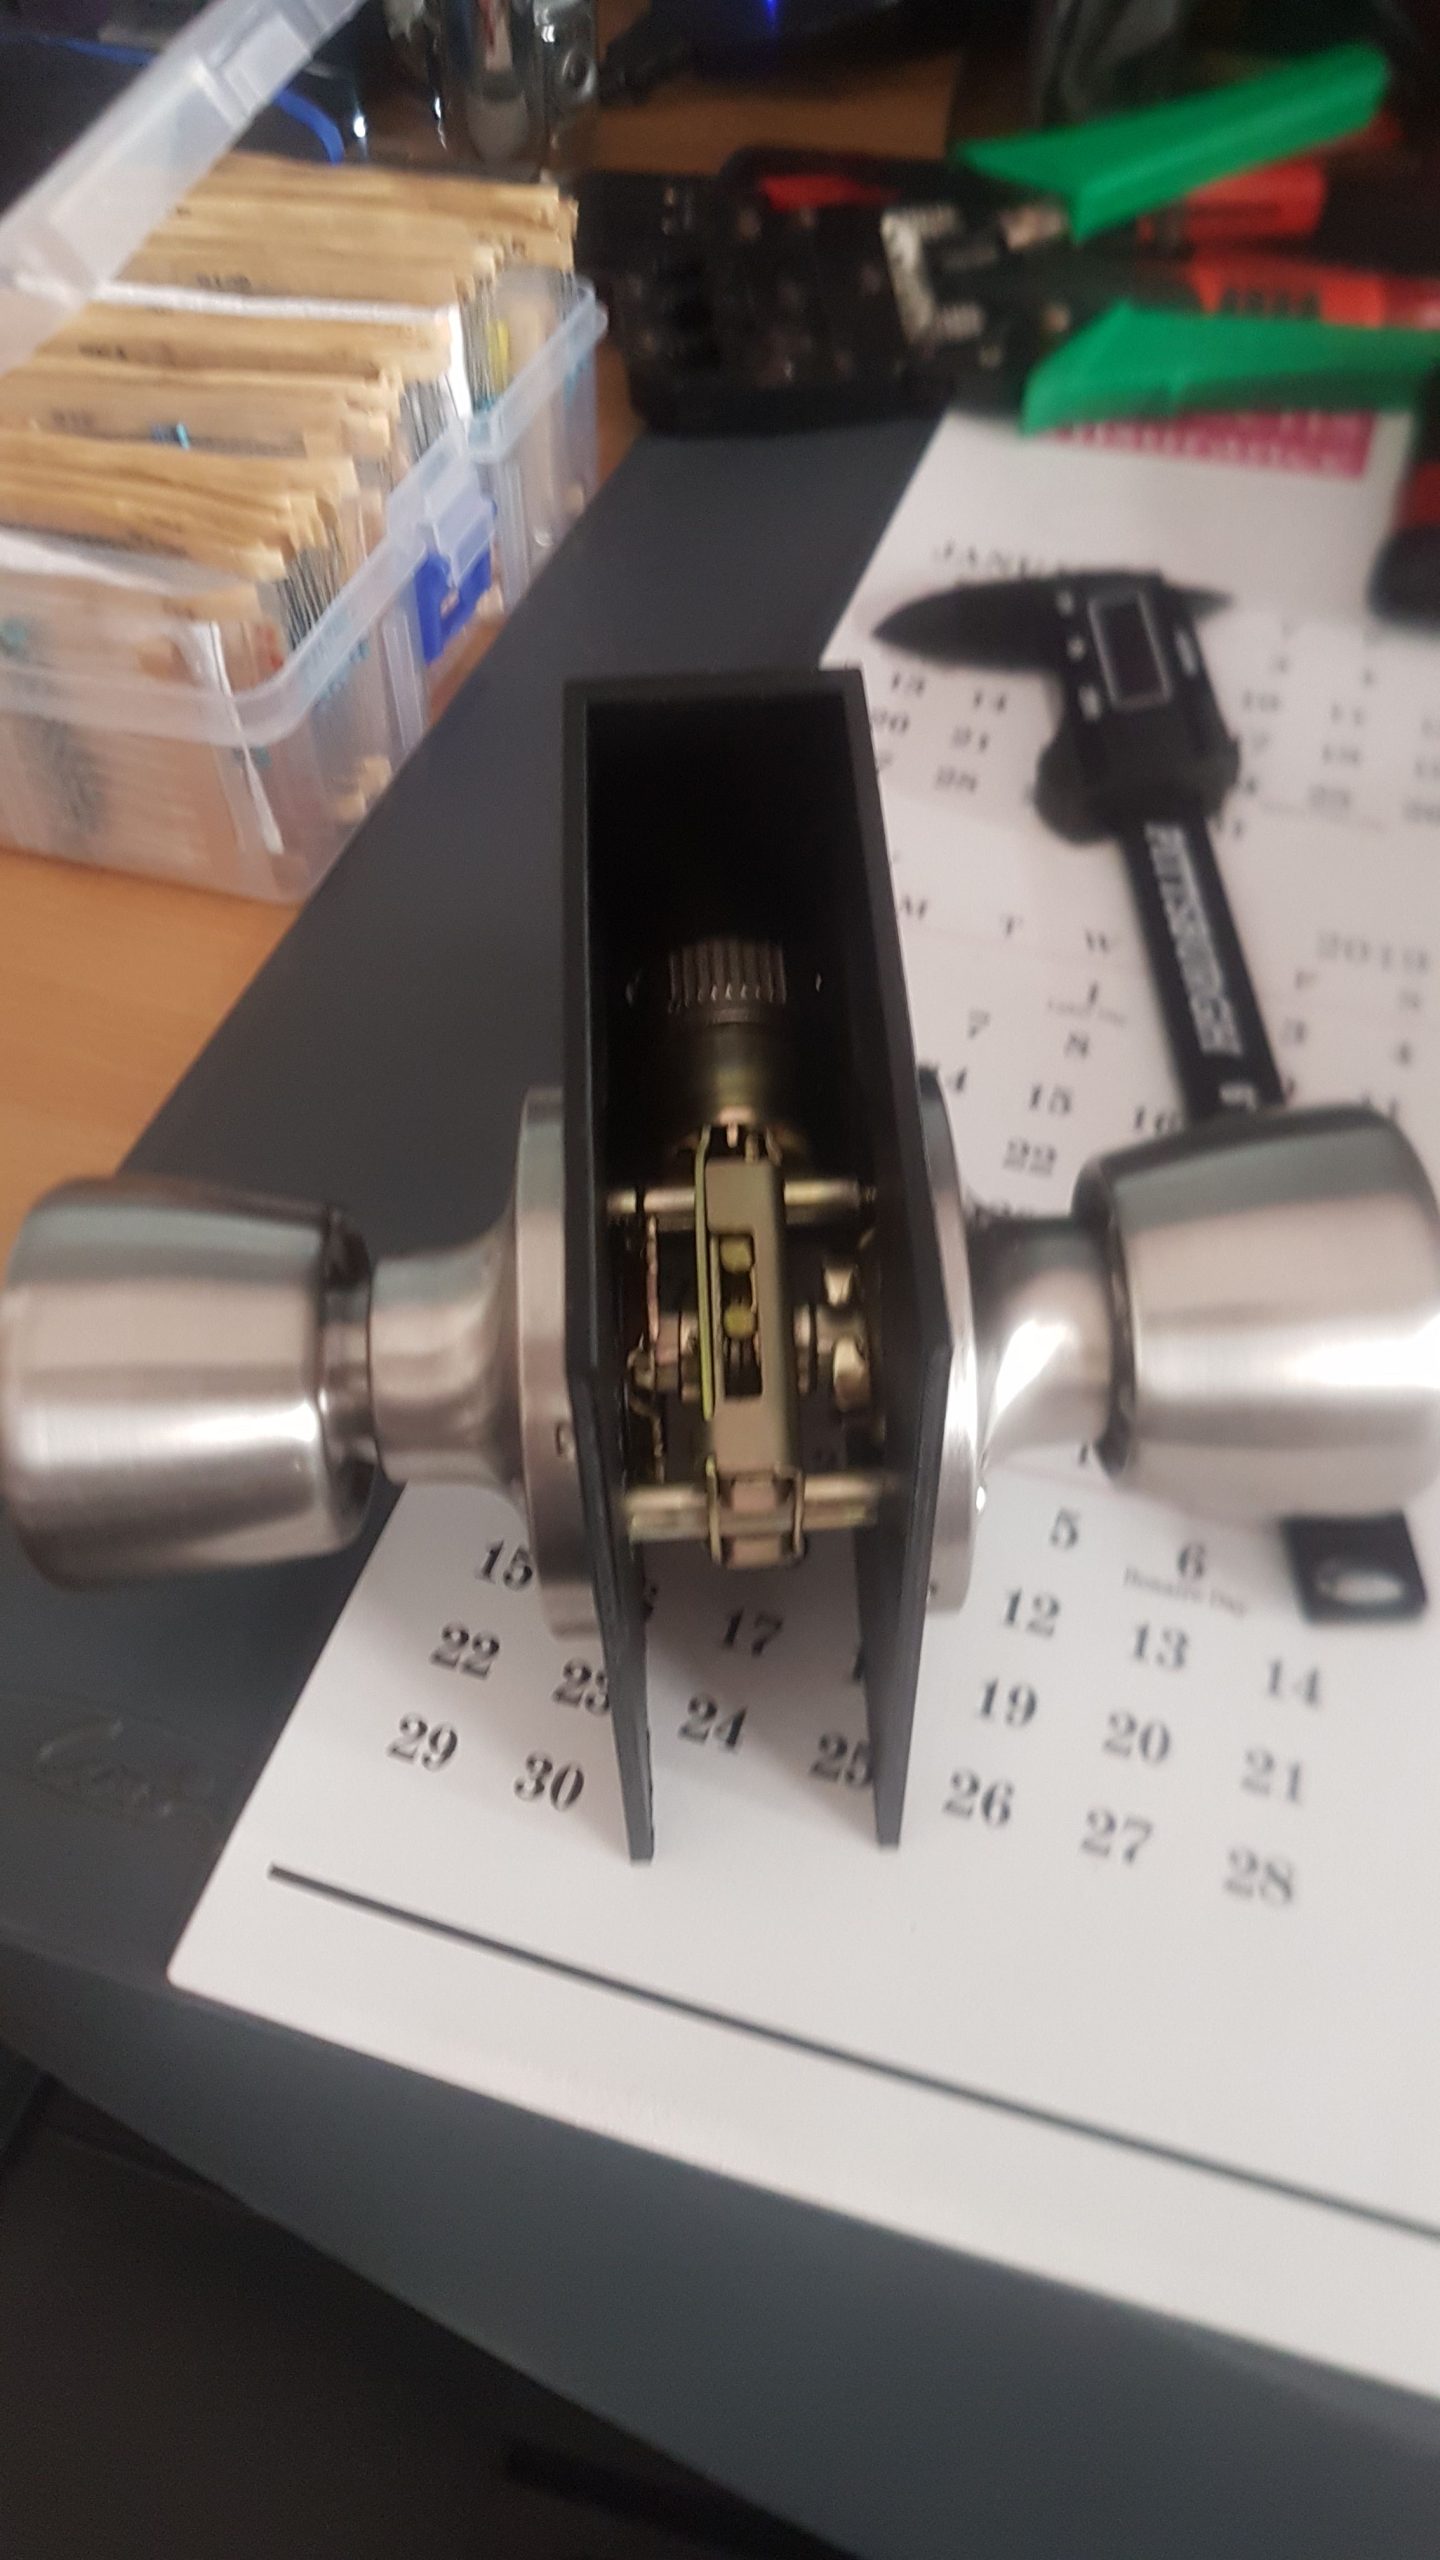
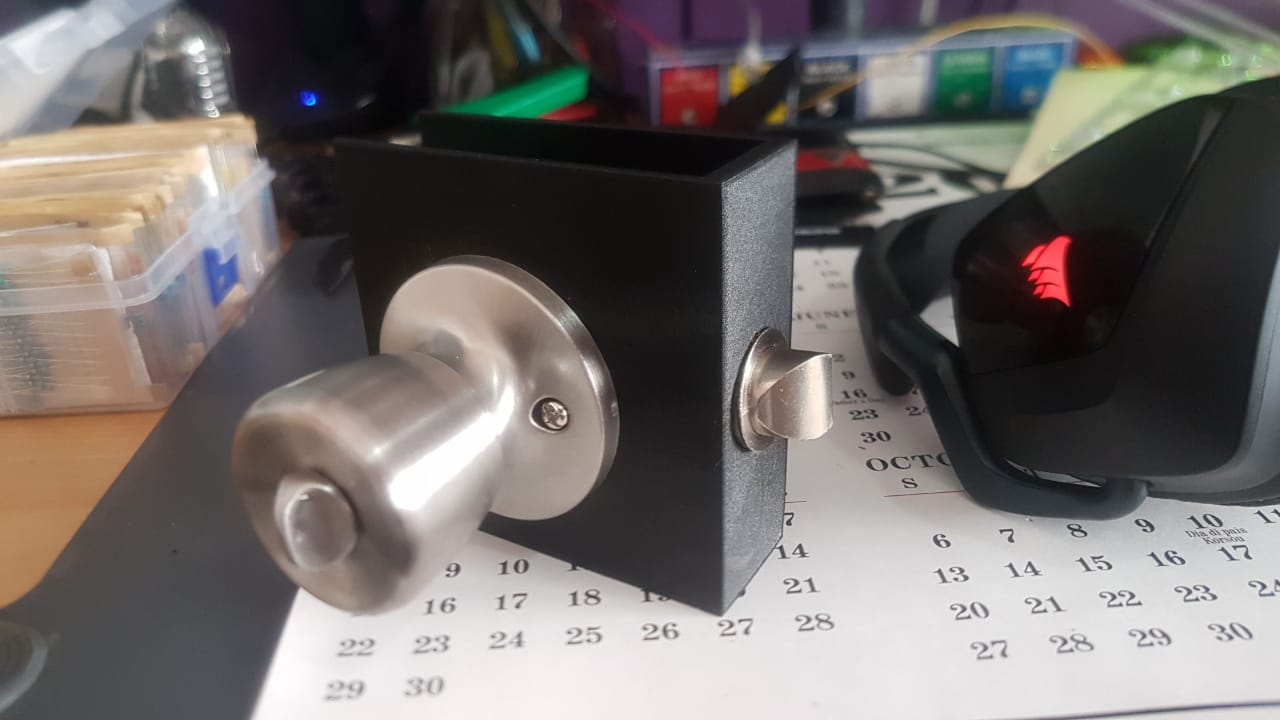
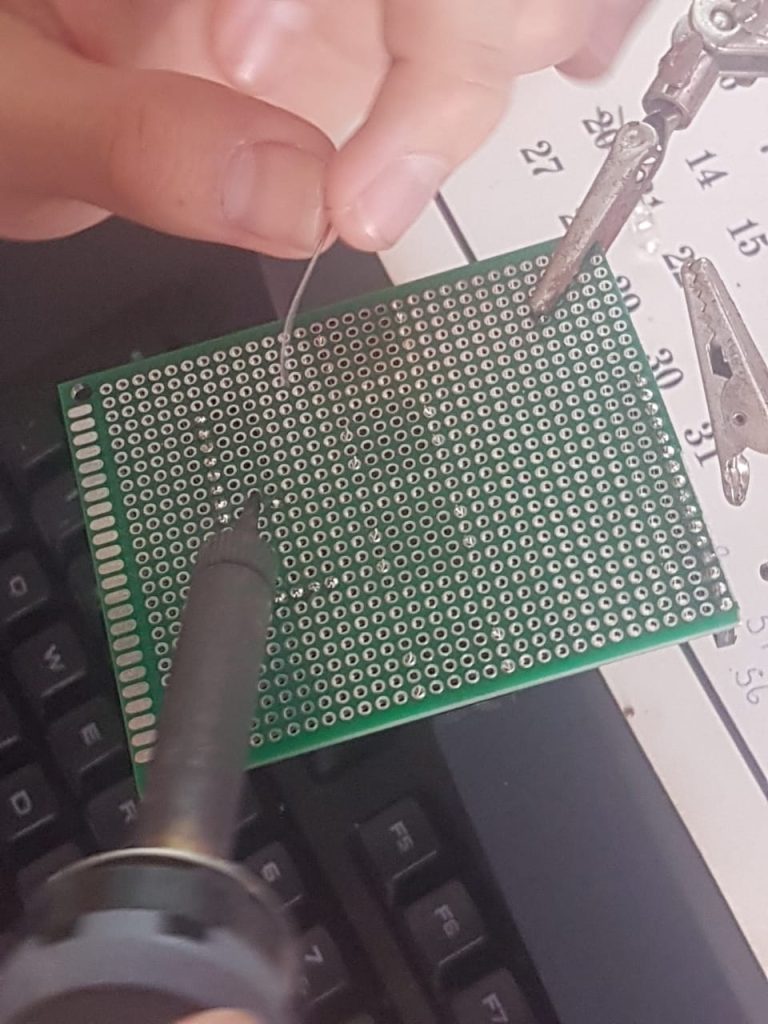
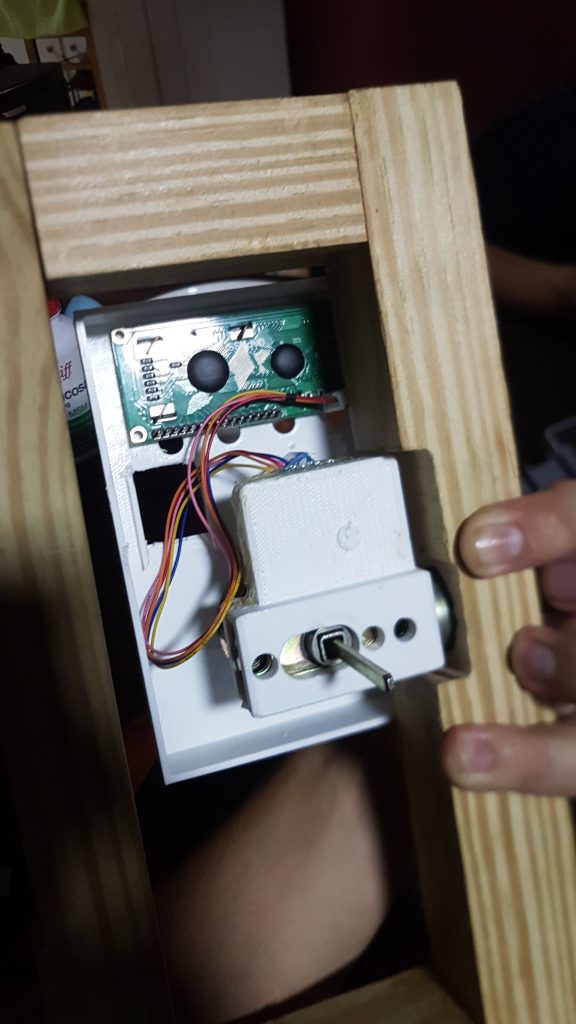
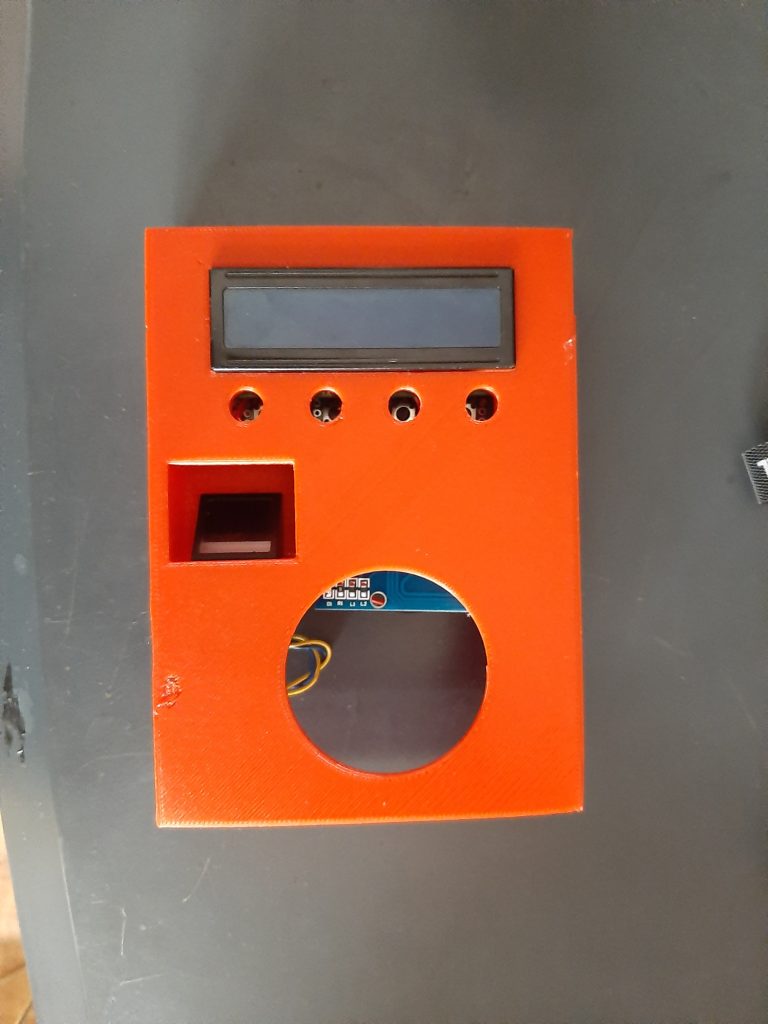
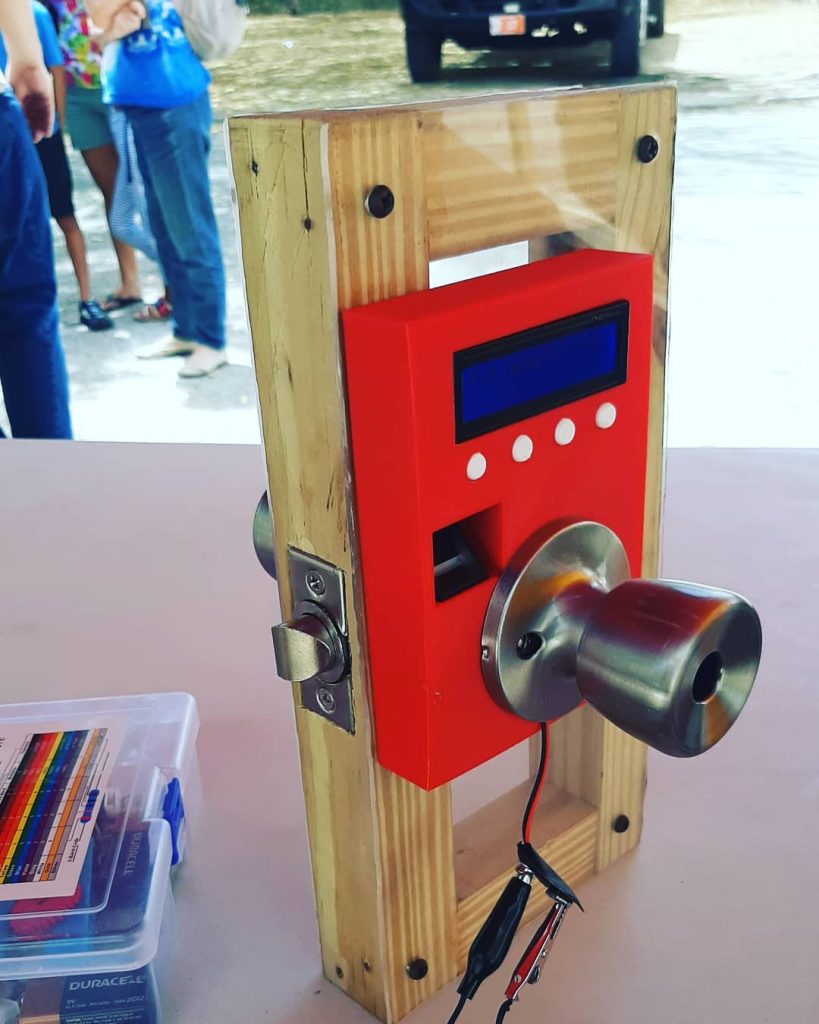
With the breadboard prototype functioning successfully, it was time to give the project a more refined and presentable look. I initiated the task by designing an aesthetic and compact case that could house all the components neatly. The next step was to move from the breadboard to a more permanent and robust solution. I soldered each component onto a PCB board, ensuring compactness and stability of the system.
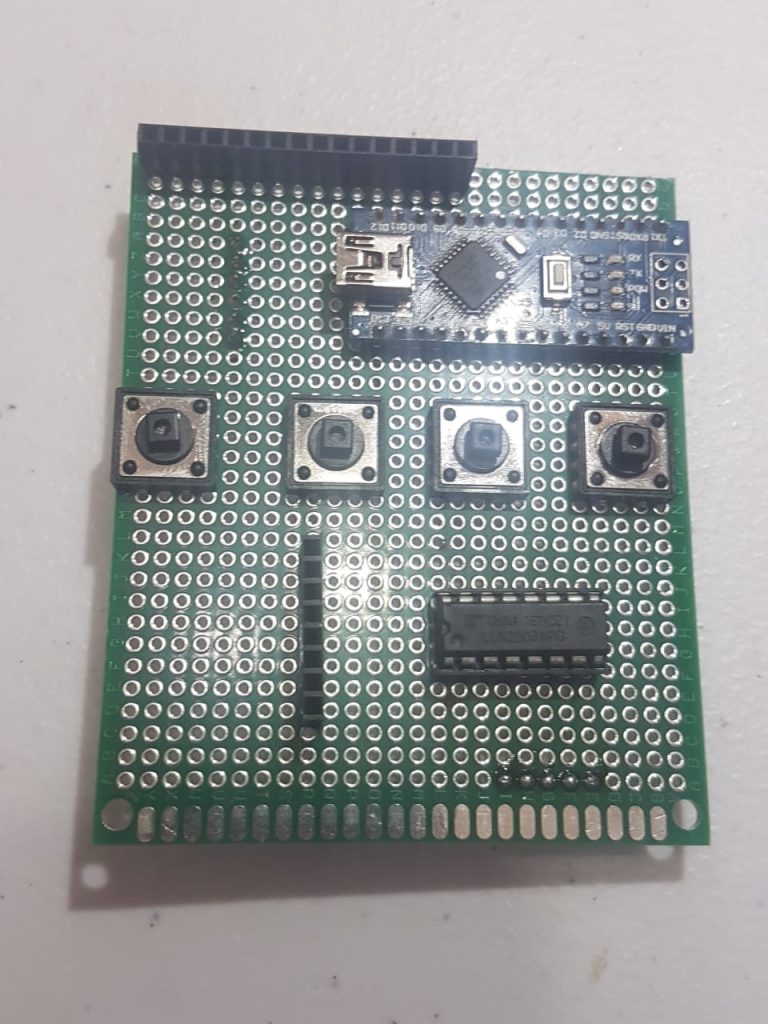
Moreover, it was time to integrate the door lock mechanism into the design. With the 3D printed gear system and stepper motor in place, I assembled everything together. This process involved installing the lock mechanism, ensuring it interfaced correctly with the electronic system, and encasing the entire assembly into the designed case.
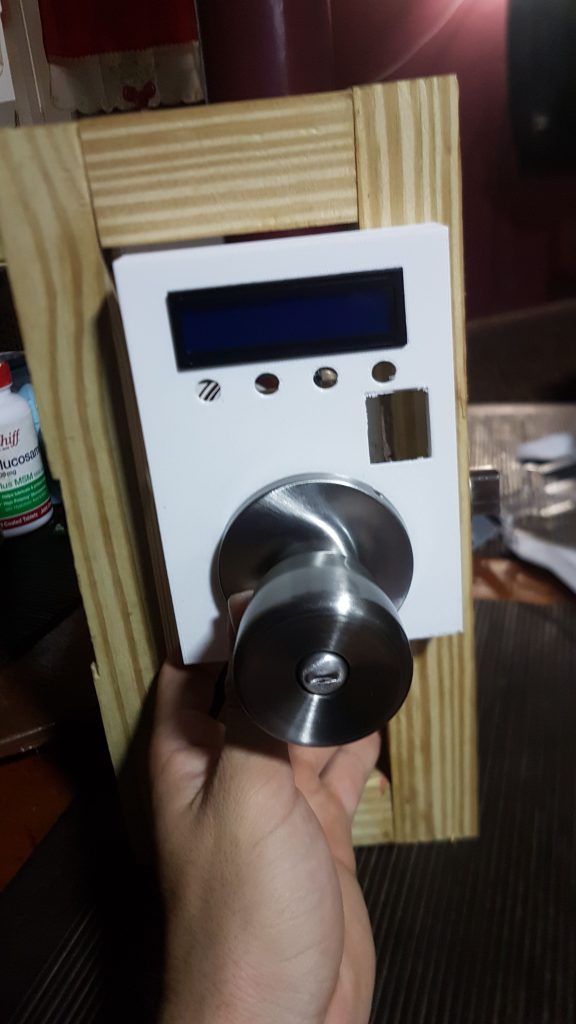
The process was meticulous and required a keen eye for detail, but it gave the project a polished and professional appearance. The satisfaction of seeing the components come together in a neatly packaged and fully functional smart lock was immense.
Even after the physical build was complete, the project continued to evolve. I began refining the software, making updates to improve functionality and ease of use. The user interface on the lock’s screen underwent iterative changes to make it more intuitive and user-friendly. The goal was not only to have a working device but also one that was accessible and easy to use.
This stage marked the transformation of the project from a mere prototype on a breadboard to a finished, stand-alone smart lock system, with continued software improvements for better user experience. The journey was challenging but equally rewarding, offering numerous opportunities for learning and growth. With every update and modification, I was not only enhancing the smart lock but also honing my skills as an engineer.
Th3Cod3/Smart-Hybrid-Door (github.com)
Conclusion
The journey from conception to completion of the biometric door lock system was an exhilarating experience that provided me with valuable insights into the challenges and rewards of hands-on engineering. As an Electrical Engineering student in my second year, this project pushed me to apply the theoretical knowledge I had acquired in a practical setting, emphasizing the importance of adaptability and problem-solving skills.
The project took a different route than initially planned, with the decision to prioritize the fingerprint functionality and put aside the RFID component for the future. However, this shift in focus did not detract from the project’s success. Instead, it taught me an essential lesson about project management and the need to focus on core functionalities when time is of the essence.
The final product, a fully functional standalone biometric smart lock, was a source of immense satisfaction. From the initial breadboard prototype to the final soldered PCB inside a custom-designed case, each step in the journey was a learning experience that I will carry forward in my future projects.
Even after the project’s completion, the door lock system remains a continuous work in progress. The iterative process of refining the software and improving the user interface underlines the evolving nature of engineering projects. It reinforces the understanding that a project, once completed, isn’t truly “finished.” Instead, it’s the starting point for continual improvement and innovation.
In retrospect, this project was not just about creating a smart lock; it was a remarkable journey of learning, experimentation, problem-solving, and ultimately, personal growth. It has left me better prepared for my future pursuits in electrical engineering, and I look forward to bringing the skills and knowledge gained through this project to my future endeavors.
Acknowledgements
I am immensely grateful to everyone who supported me throughout this project. Special thanks to my professor, Dr. Gerald Solognier, whose invaluable guidance and support were instrumental in bringing this project to fruition. Additionally, I would like to express my gratitude to OpenAI’s ChatGPT, which assisted me in articulating my thoughts and experiences more effectively throughout the documentation process. This project would not have been possible without the support and resources provided by all parties involved.